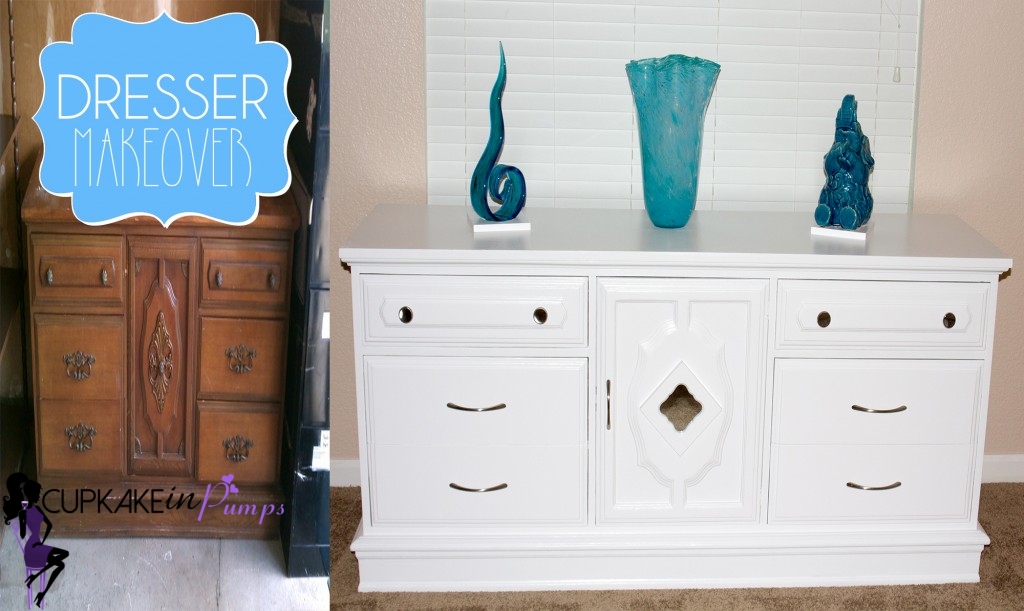
Our very first DIY furniture project ~ Prime, Prime and More Prime: Dresser Makeover and Don’t Forget The Primer, is back with an update.
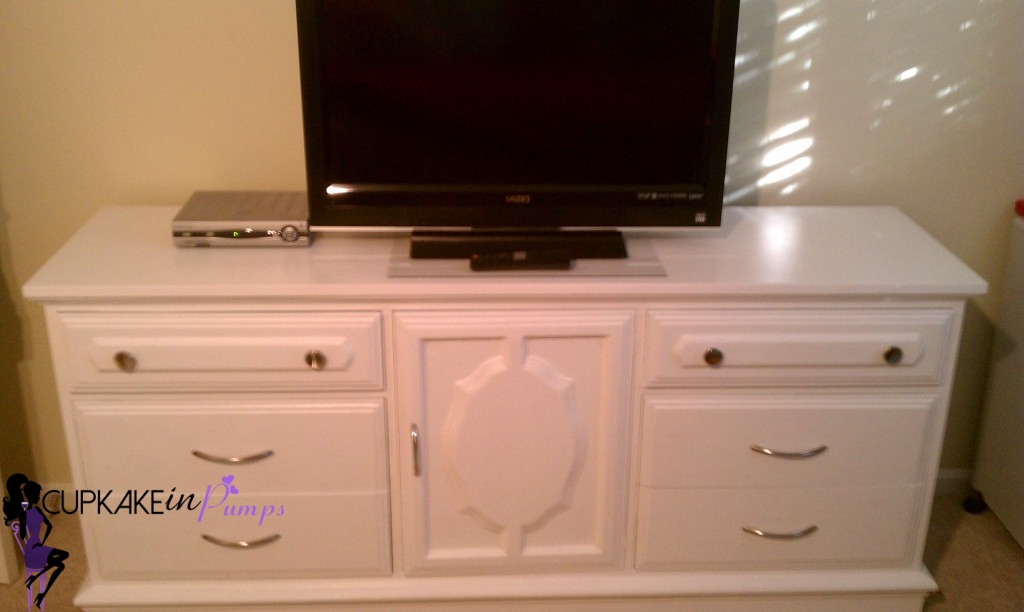
When we moved we left a bunch of stuff in storage, which was a huge mistake, after we realized the money we put into it, only to bring a few items back with us. After being moved into storage, boxes piled all around and on top of it, to being loaded on the truck to Cali, then being unloaded into our home… this dresser was looking like it had a really rough life. We decided before we brought it all the way upstairs, that it was going to have to be painted again.
When we first redid the dresser we only did one side table, because the other one wouldn’t fit in the room. My suggestion is to make sure you do everything at the same time, even if you don’t have enough room. The reason I say this is we lucked out on the handles, but what if you get special ones and they don’t sell them anymore. Or and this happened to us, you had to drill new wholes for your handles and now the table you didn’t paint has the old wholes because you forget to fill them… Now we have to fill them and paint it again. And lastly what if you go with a certain color and later on you can’t remember what you painted with and now you have to redo everything over… Or you can just say forget it and just use that extra table for storage!
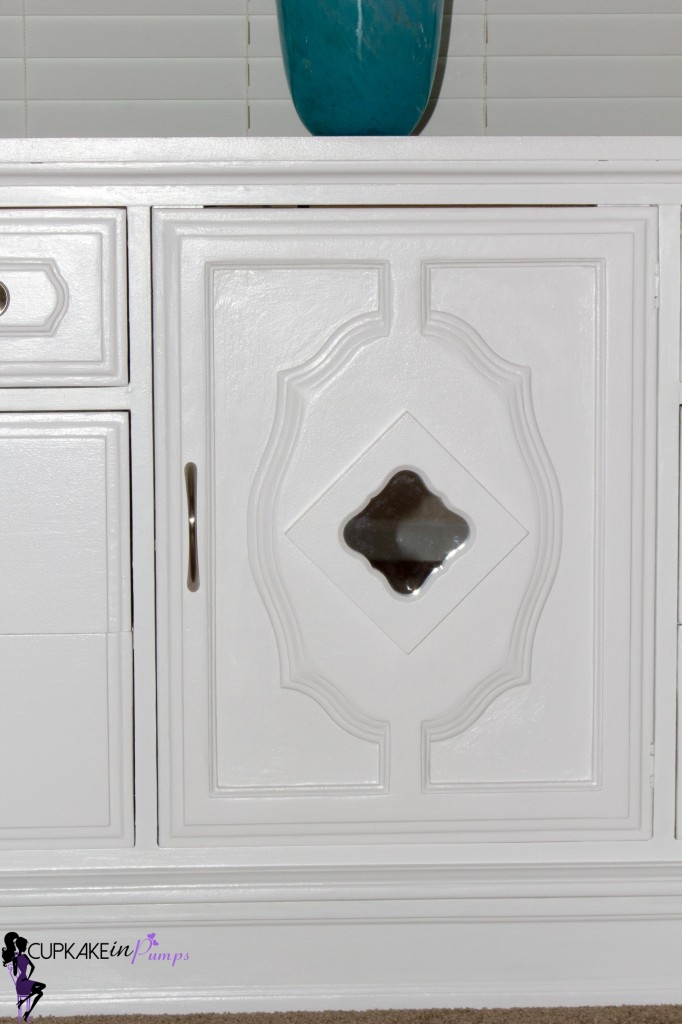
With our very first experience we learned the lesson that priming is very important…. until now! In my post From Old To New ~ Chair Makeovers, I explained ” the guy who worked at the paint department said we don’t need to sand or prime if we bought this ALKYD Semi-Gloss Enamel Paint from Behr.” We had so much paint leftover from the chairs and since they were such a success we decided to go ahead and use it on the dresser and side tables. The hubby did a light sanding because of the knicks…. and three days later we had what looks to us professionally painted furniture. Now before I go, I just felt like something was missing from the dresser and so to Ross I went… I came across these four little mirrors that had a distressed look to them. I only wanted the one that you see on the dresser, but of course I had to buy them all, so the others are displayed throughout the room. The distressed look did not go well with the bright white, so all the mirrors were painted the same color as the dresser. To glue the mirror to the dresser, I used cement glue and whatever heavy cans I had in my pantry to hold the mirror in place. I let this dry overnight!
Now the dresser is feeling brand new and has a new place in our Guest Bedroom, I couldn’t be more happier with the way it turned out and A HUGE THANKS TO THE HUBS FOR HIS EXTRA PAIR OF HANDS!!!!
Before (Original)

Before(Painted And Primed)
Now