Hey Sweeties!
Have any old frames lying around, collecting dust or maybe you are thinking about throwing away? Today I will show you how I took this old dusty frame and made it GLITTER.
At first, I couldn’t decided what to do with this ugly frame that we grabbed from the side of the dumpster. You know those shows where people Dumpster dive and find awesome stuff? That was never me, until the apartment building we where living in was getting vacating and all the tenants had to leave. Allegedly it didn’t have enough beam supports to protect it from Earthquakes (but a new company bought it and I believe they wanted to skyrocket the rent), so people were throwing really nice stuff away. I wouldn’t really call what we did diving because everything was always placed on the outside of the dumpster. We ended up with some great things which would be several other posts…. and today we are talking about this frame. LOL
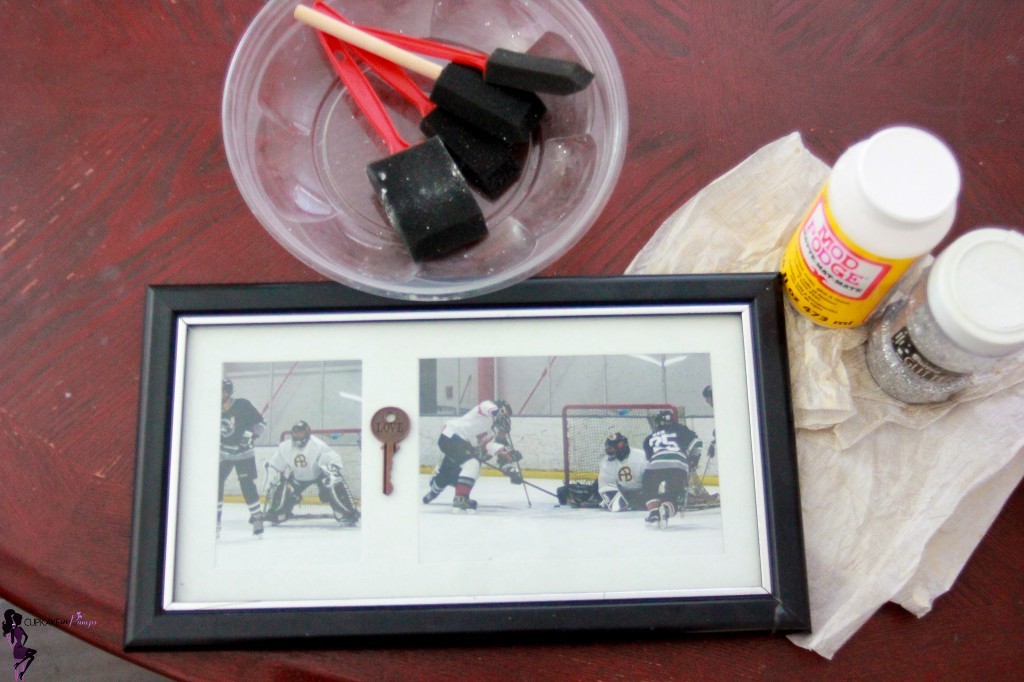
One day while walking Toni (Yorkie-Bishon Mix), we saw a box filled and at the top was this frame with some hockey pictures in it. I told the hubs to leave it, but he wanted it for his office to insert his own images to replace the hockey pictures. LOL Hubby ended up bringing the frame back home, because he couldn’t decide what pictures to use; “and this went to the collecting dust for about a year pile”.
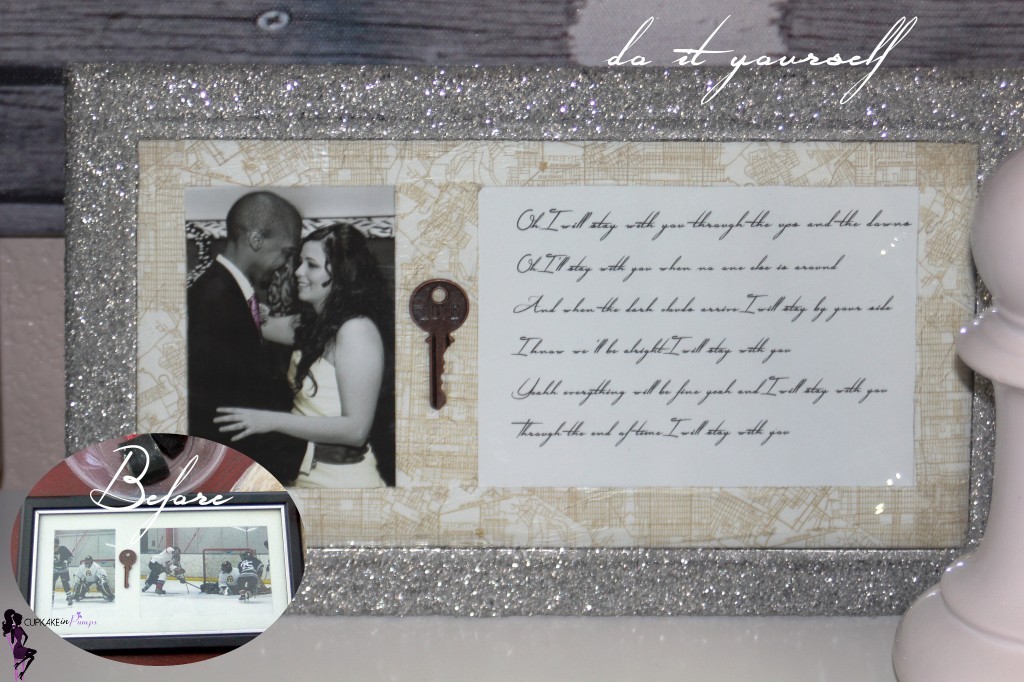
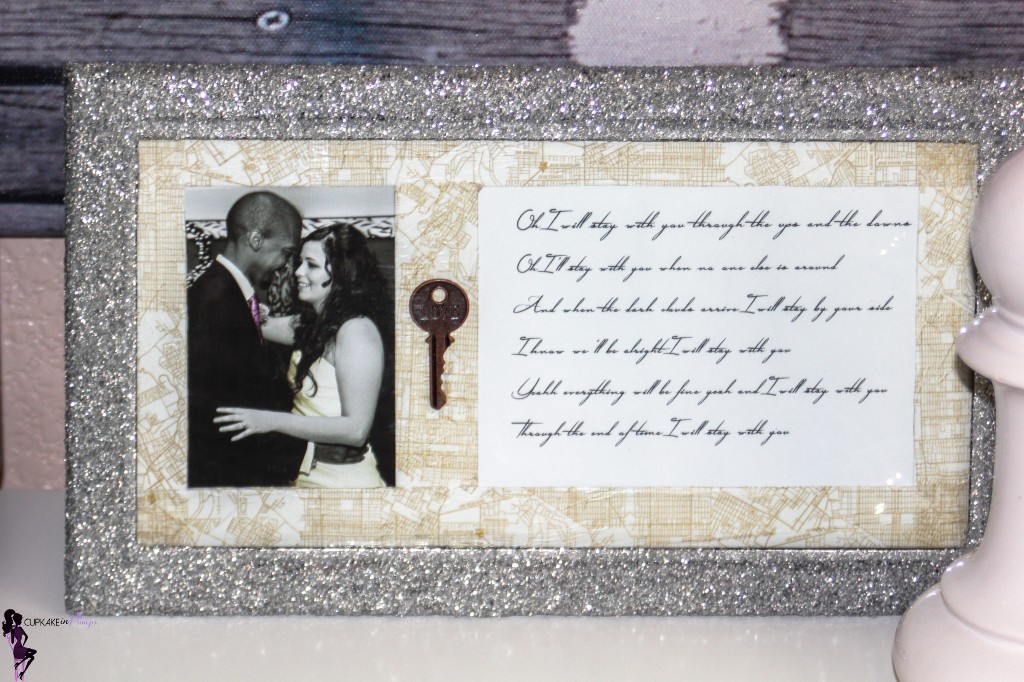
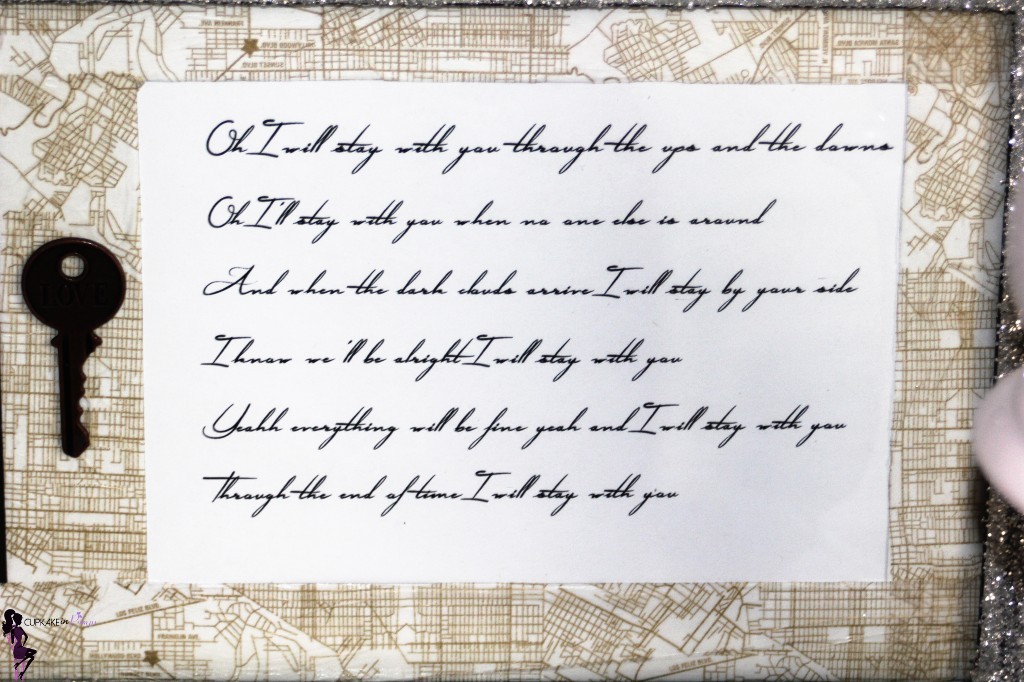
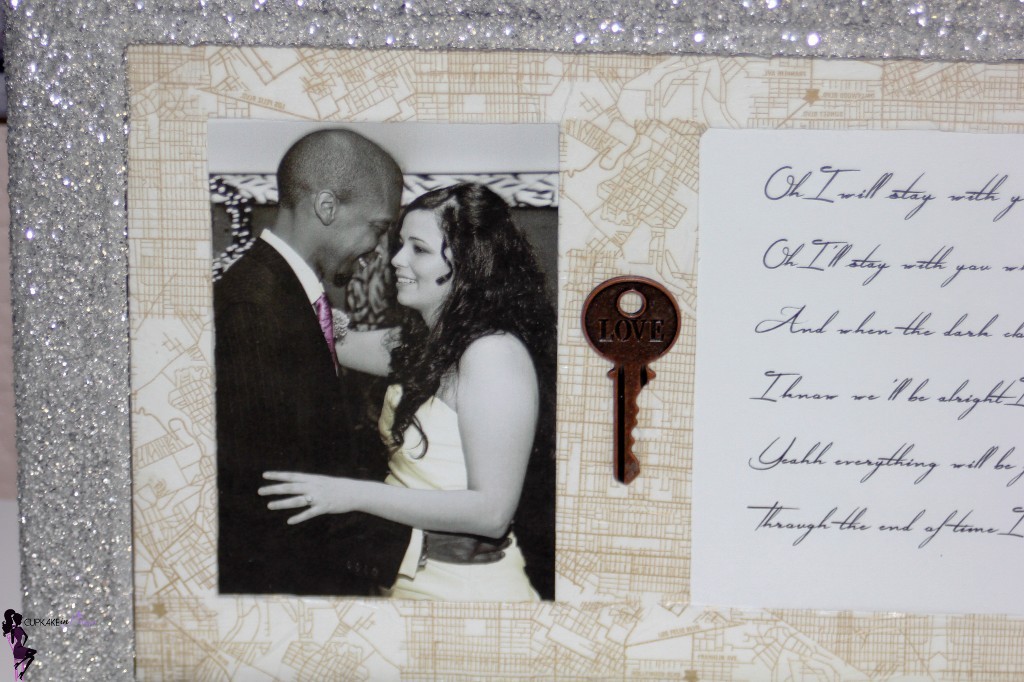
We moved and decided our first room to decorate would be the office. We bought some Ikea book shelves that needed items to fill it up. Hubby has a picture frame on his side and wanted one on mine. That’s when a light-bulb went off in my head and I remembered the frame in the collecting dust for about a year pile. This would be the perfect thing for the shelves, our wedding dance photo and song. Ok… got that out of the way… Now onto the actual frame and mat. While going through my craft box, a love key fell out and knew would be perfect (because the hubs knows he has the key to my heart… well I tell him all the time). Everything was starting to come together and THEN!!! I saw the glitter that was used on the DIY Jewlery stand, some tissue paper from a pair of my pumps and from there the project came to life!
By the way I would glitter everything if I could. hehe
Other things you will need:
Mod Podge ~ Craft store
Sponge brushes ~ Dollar Store
Empty plastic container
Newspaper
Keeping scrolling down to see the images from this project:
Here is the before:
For the frame:
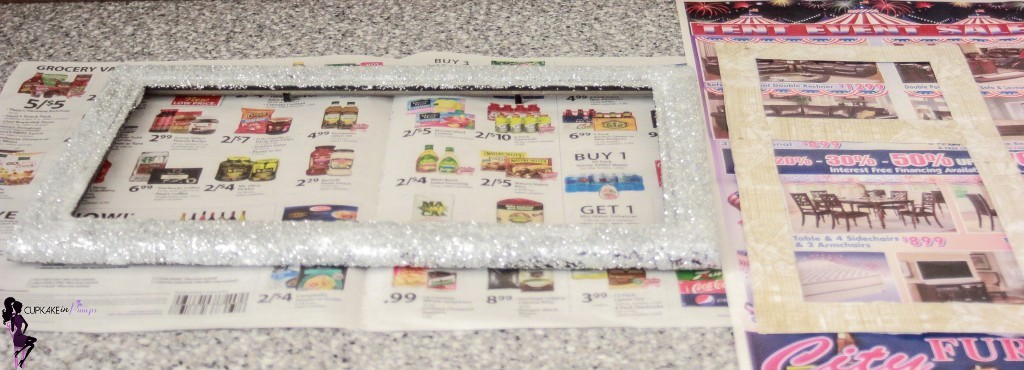
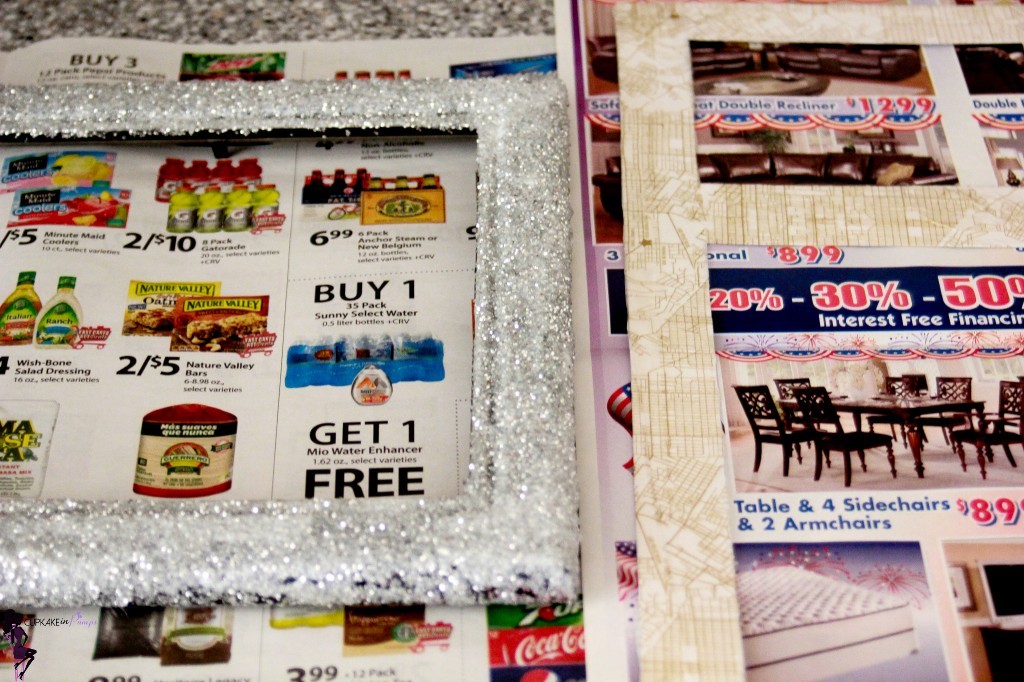
- Add about 5 coats of glitter (I didn’t really focus on the bottom because no one will see it)
- Apply the mod podge to the frame then sprinkle the glitter on top of the glue (make sure you have the newspaper spread out on the table, cause this part is messy)
- After each coat, expect for the last one, put a layer of podge on top of the glitter.
- Wait at least 15 minutes before your next layer.
For the mat:
- Apply glue to one side
- Then line the tissue up to it and press it down
- Cut the rest of the paper just leaving a little at top to glue that to the back of the mat
- Add a layer of mod podge over the tissue
- Continue until the whole mat is covered
Let everything dry overnight!
Now that everything is dry, add the images you like. For the key I used regular tape to hold it in place, by just rolling it and sticking it on the back of the key.
By the way MOD PODGE is AWESOME!!!!!!